The text on this page describes the basic steps to overhaul the 5-speed gearboxes used on all BMW 2-V boxer motorcycles since the /7 series. I took these notes following the rebuild of the gearboxes of my trusty R80GS in spring 2002 and that of my R100TIC during a workshop organised by the Motorradclub Weingarten in 2002-10. The page was further extended with photos and details in 2009-01.
This description is focused on a "standard" overhaul of the gearbox. It is not a complete description of everything that you could possibly do with an open gearbox, but I always appreciate constructive comments and, in particular, contributions ;-)
... and the usual disclaimer: These are things that I did myself on my own motorcycles. I tried to keep the text as generic and - of course - as correct as possible, but if you repeat this with your bike, you do it at your own risk.
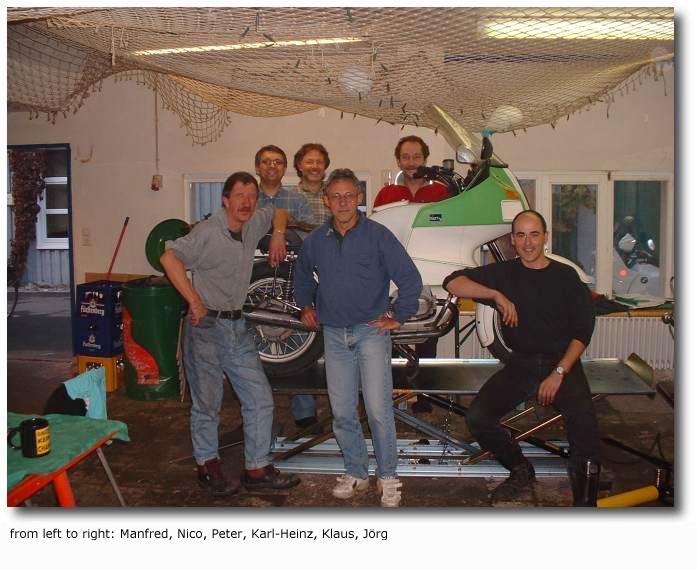
Many Thanks to Klaus "oelzeug" for organising this course and to Manfred "Manne" for the introduction to BMW gearboxes in the first workshop! Further thanks go to Arthur Sprenger for "CNC-capturing" the original BMW measuring plate and to Niko Arabatzis, Daniel Dicke and Matthias Otto for detailed hints, annotations and improvements.
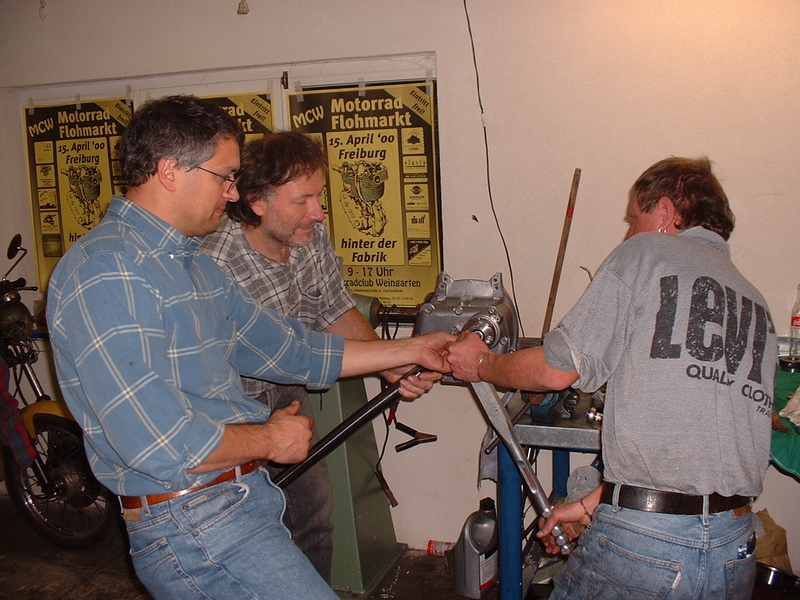
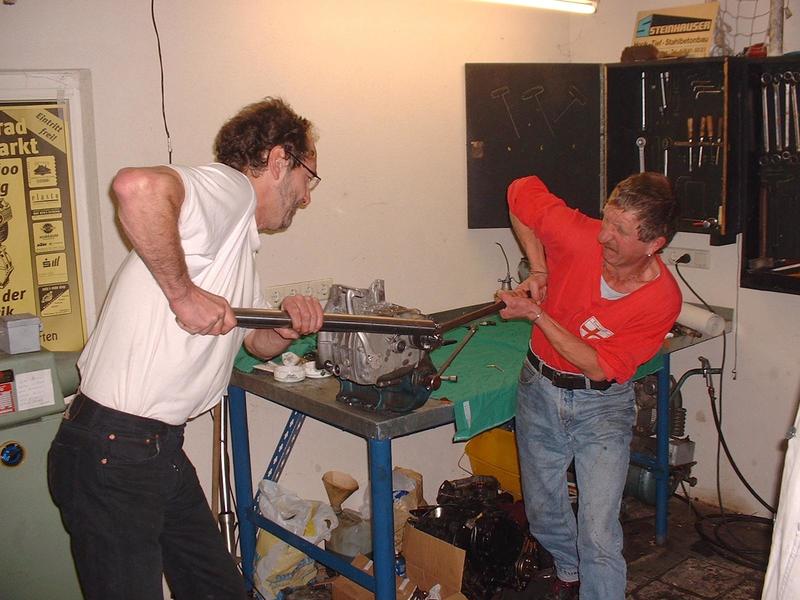
First of all, a warning: Overhauling the gearbox is a job that cannot be done with just the tools of the average do-it-yourself mechanic. You should have a sound amount of experience with maintaining your own motorcycle. Gearbox mechanics is a pretty interesting mixture of "brute force" and precision mechanics, so you will need a rather well-equipped workplace and several special tools, plus sufficient force to deal with torques in the 220-Nm range.
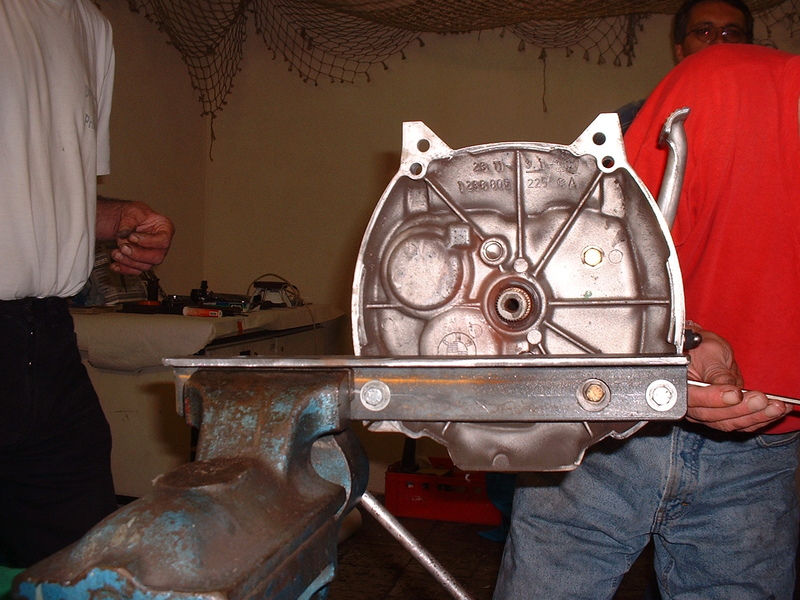
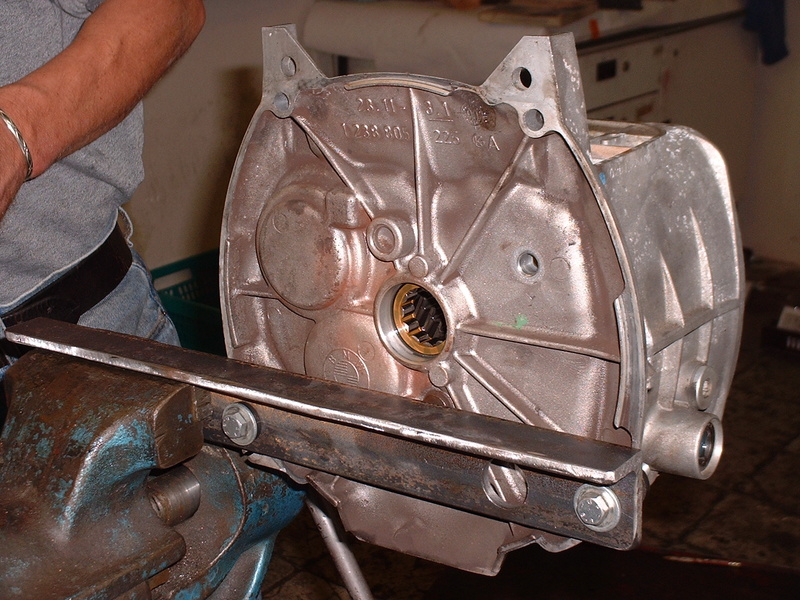
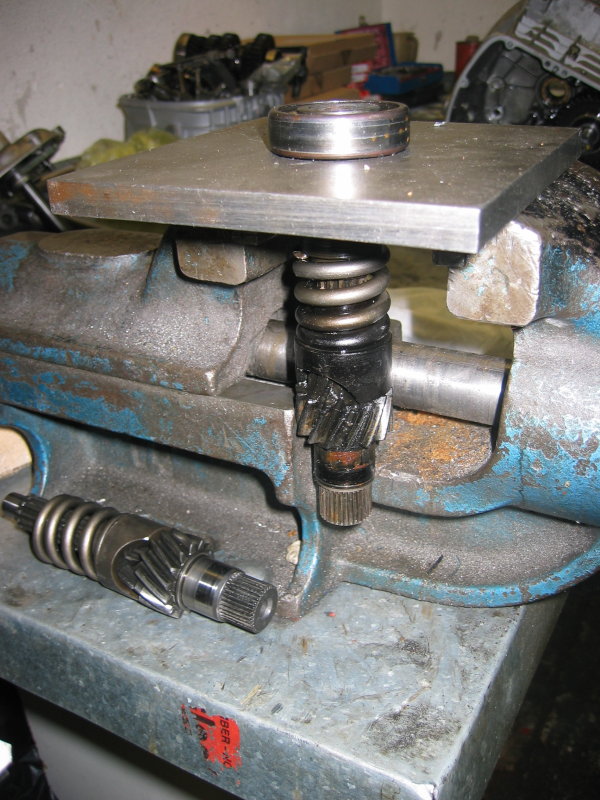
Your workbench must be stable and provide enough space and light. To fix the gearbox either in the horizontal or the vertical orientation, BMW shops have a special jig or "cage", but a simple, solid steel angle like the one shown here does the job. Drill two holes with 9 mm diameter and 215 mm apart, plus a third hole with ca. 22 mm diameter that is located 47 mm from the right-hand hole (and ca. 4 mm off-axis); the latter is to access the lower bolt that holds the internal shifting mechanism in place. Make sure that the device fits perfectly to the gearbox and that the complete assembly is firmly held to the workbench.
Actually you can perform the overhaul without such a support, but it helps a lot ;-)


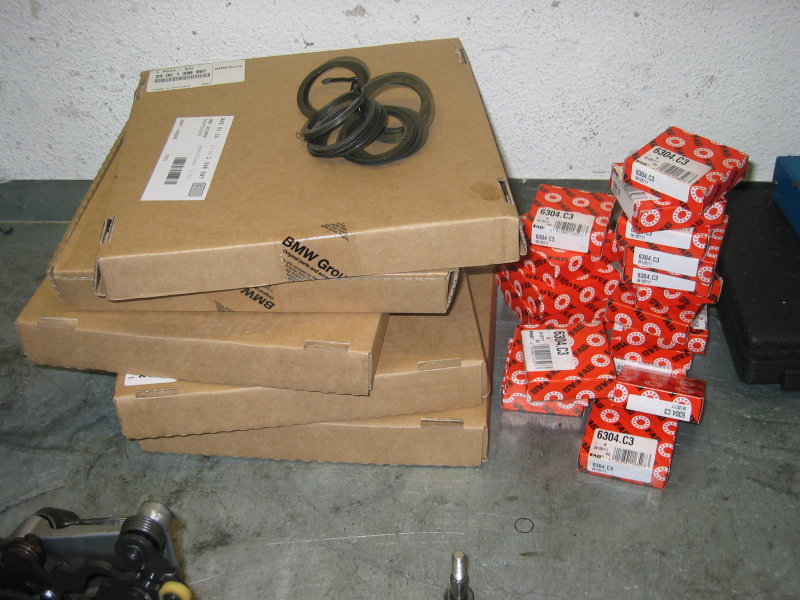
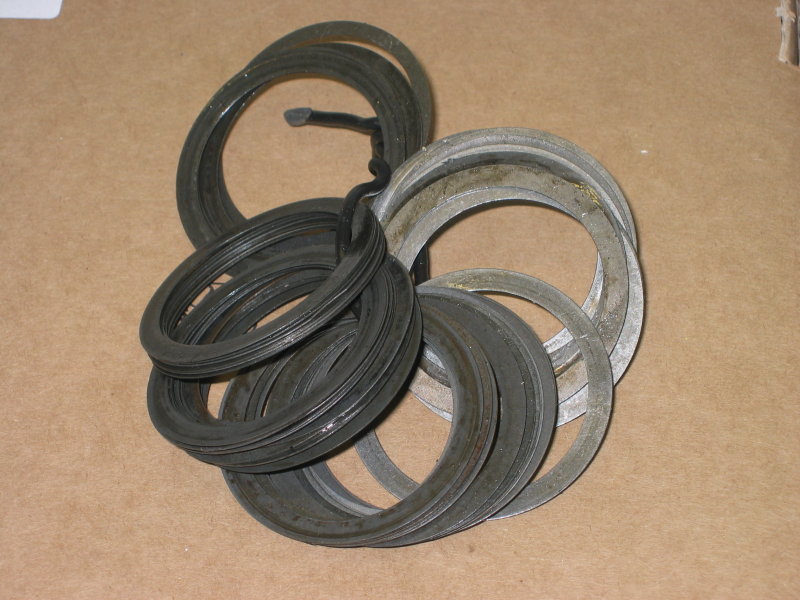
As for the spare parts, the "usual" gearbox overhaul involves replacement of the five ball bearings (the sixth bearing is a large cylindrical roller bearing and usually does not need replacement) plus the replacement of all seals. You can download a list of the commonly required spare parts here as Open Document spreadsheet. Make sure you have these parts at hand before you open the gearbox.
Note that the gaskets are also available as a complete set; for the BMW paralever gearboxes, the part number is 23 00 1 338 597. This kit can also be used for the older gearboxes, but not the other way round.
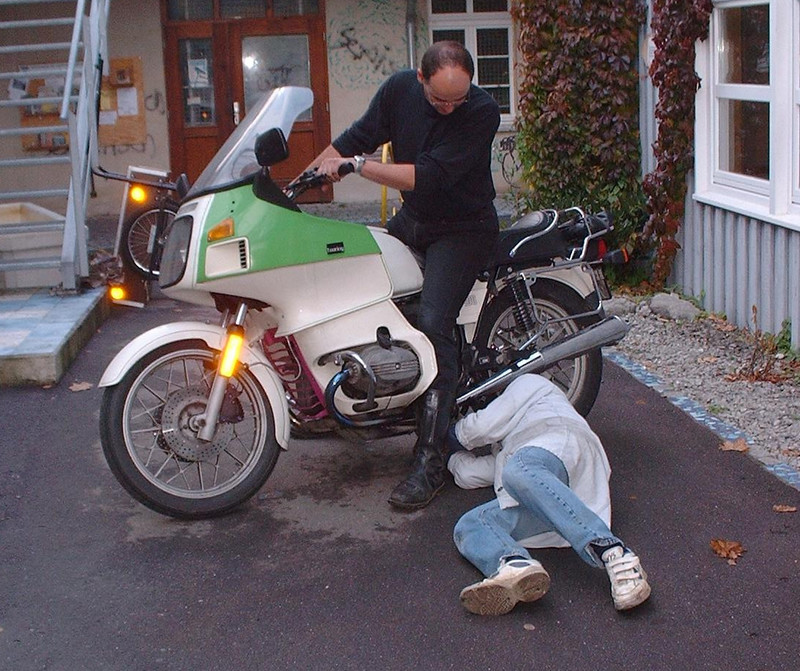
The removal of the gearbox from a Paralever-BMW such as the R80GS, R100 GS or R100R is described on my R80GS page. For the "other" 2V-Boxer models from /7 onwards, you may find the notes about my R100TIC useful.
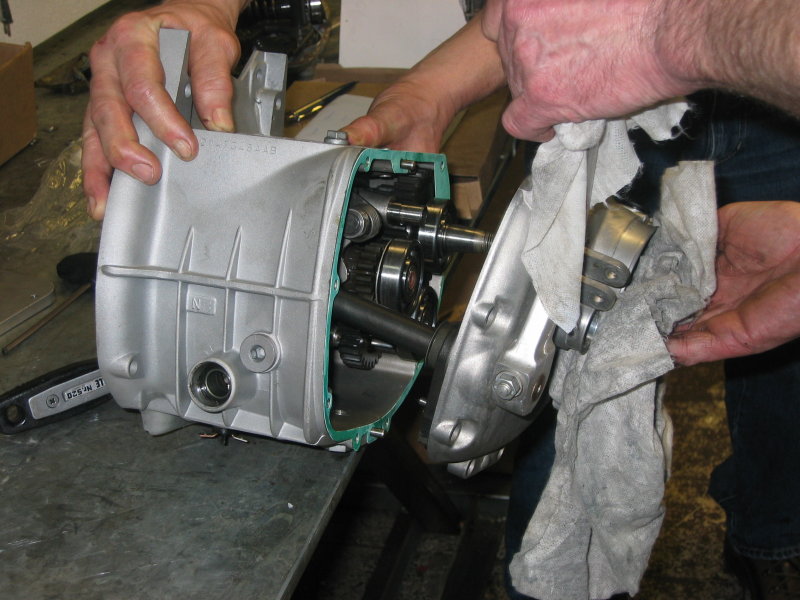
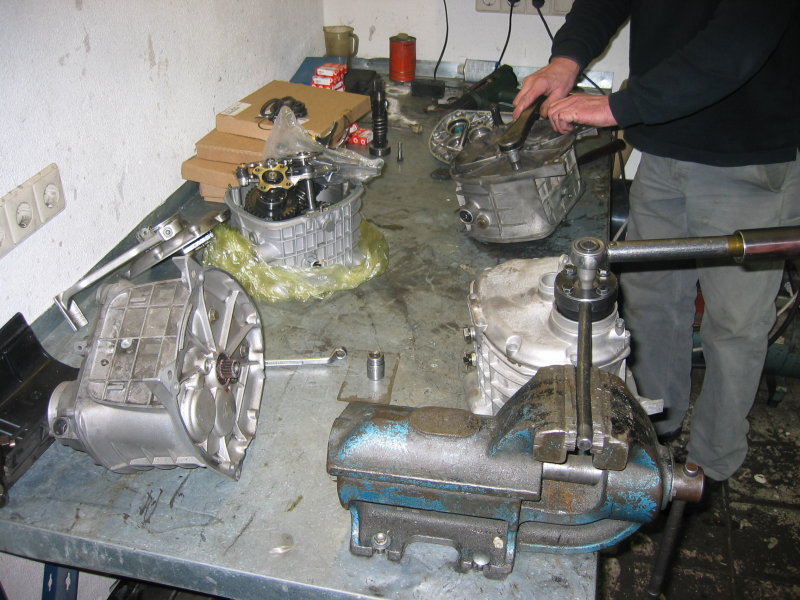
At this point, the gearbox is open and ready for disassembly. If you want to determine the axial play of the shafts (because you want to know if the gearbox was assembled correctly in the factory ;-), follow the instructions in section "adjusting shaft play" below.

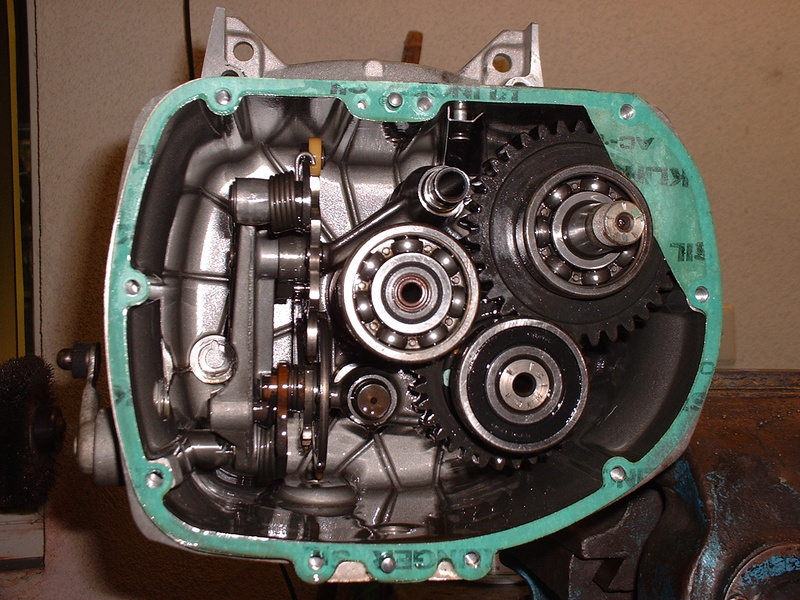
An interesting point we found was the "bearing" of the kick starter shaft: The shaft runs directly in the the aluminium housing (!) instead of using a simple bronze bush. When we disassembled the gearbox of Niko's R90S, we found that the bearing for the kickstarter shaft was completely worn out! The sad conclusion is that you should not use the kickstarter, except if really necessary ...
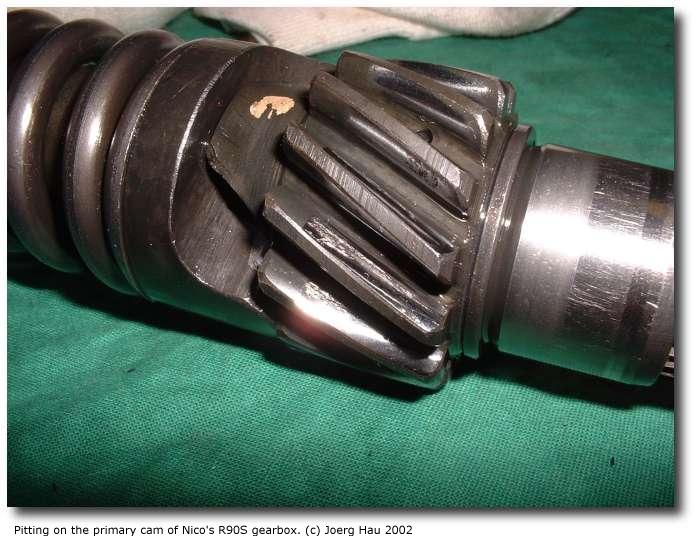
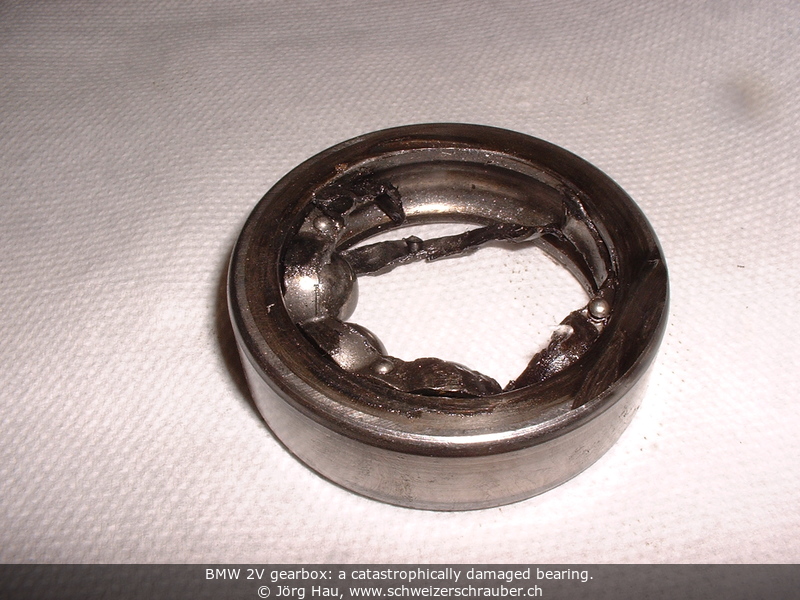
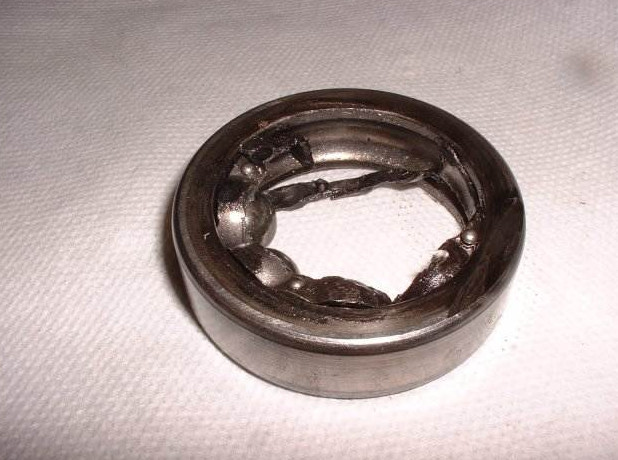
What can happen to a bearing if the signs of wear are not noticed in due time is visible in this picture. The result of the broken bearing was that the shaft moved around in the gearbox and already started to "machine" material off the inside of the cast housing ... in extreme cases, the rotating shaft may break through the housing and the rear cover.
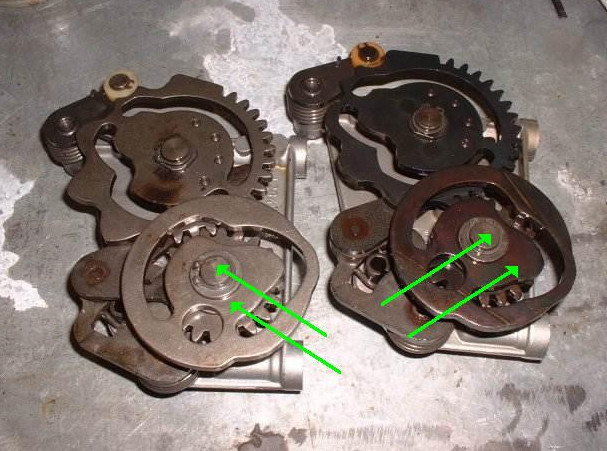
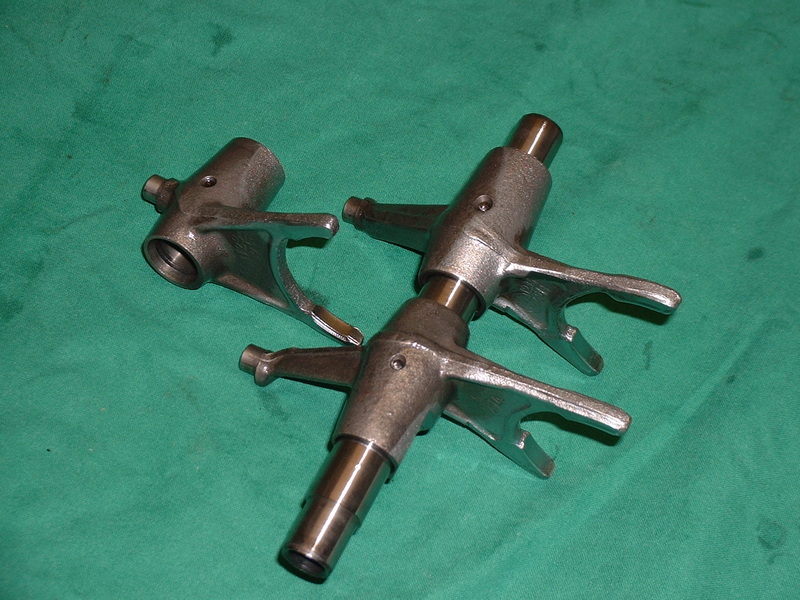
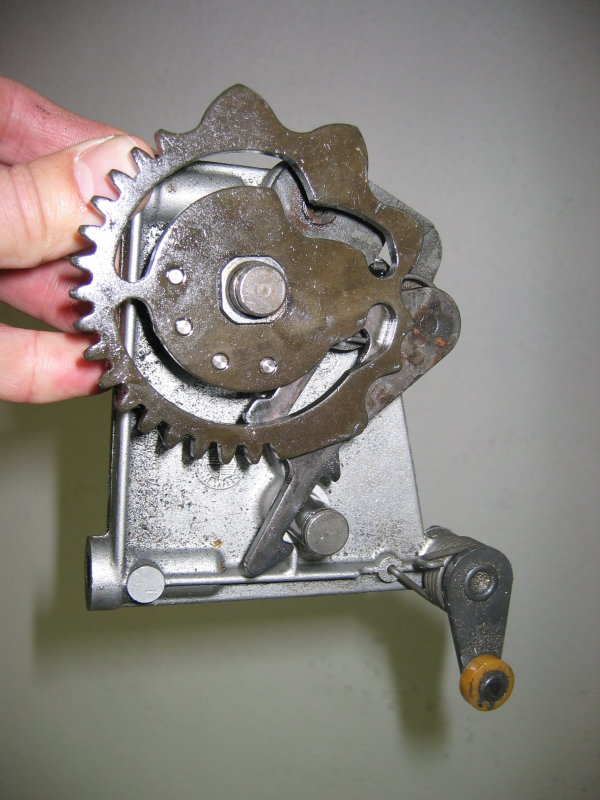
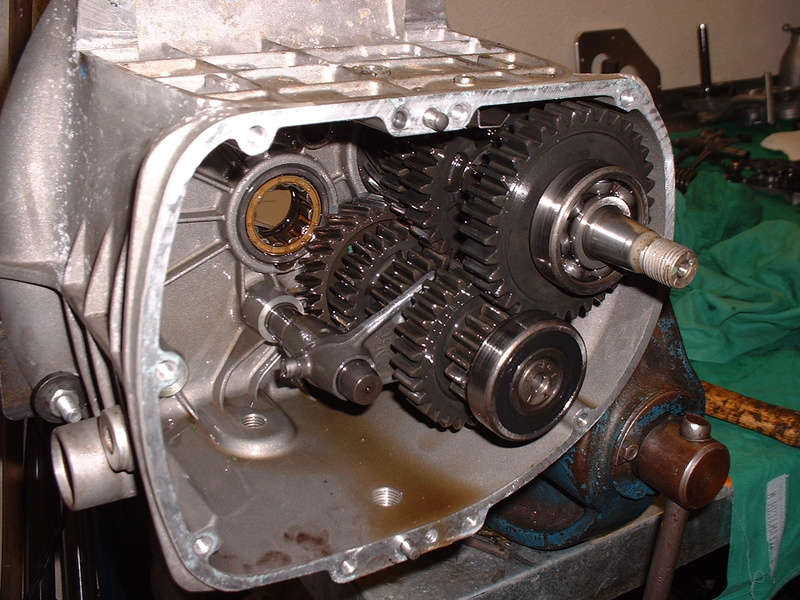
Upon inspection of the gear selection mechanism, verify carefully that the the curved disk and its axis (indicated by arrows in this picture) are connected and do not exhibit any play. If there is some "wiggle", have the two parts soldered together.
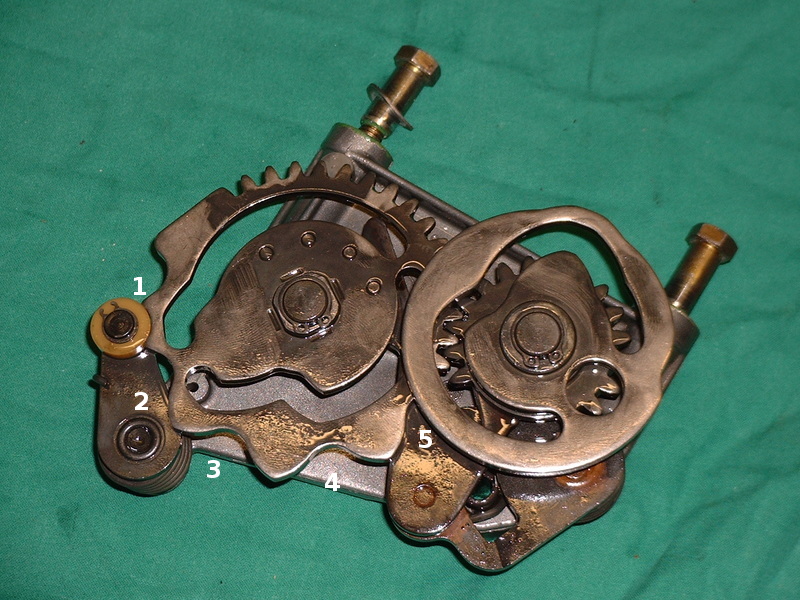
Another point worth considering are the three springs located on the gear selection mechanism. There are several reports that one of those springs (the shift pawl return hairpin spring) easily brakes so that that you cannot change gear anymore; the situation is simulated in this picture. As this is a piece that costs only a few cents, it may well be worth the preventive change. However, opinions on that subject vary widely: Some people recommend changing them every time the gearbox is opened, others say "don't change them if they are not visibly damaged".
Bruce Marshall pointed out that the length/strength of the cush-drive spring should also be checked; one his bike it had compressed so much as to allow some sort of float that causes a rattle on the overrun in 1st and 2nd gear.
The part numbers of these springs are also included in the file mentioned above.
Yet another suggestion is to change the plastic roller (visible on the left edge of the picture) against a "true" roller bearing; reportedly this improves the smoothness of the gear shifting process even further. According to Johannes Grauf the SKF 628/8 is a suitable bearing; Shaun Baisley pointed me to the 688 yet both have the same dimensions (8×16×5 mm).
The common problem with BMW gearboxes is that one or more of the bearings wear out. For the Paralever models, this is "traditionally" the large bearing that is sitting on the clutch side of the output shaft. This bearing (6403-C3) does not only take the radial forces from the other shafts and the gears, but also the thousands of little axial shocks from the shaft drive ... in other words, this bearing is supposed to absorb forces that it is not designed for to that extent.
Once the gearbox is opened, it is advisable to exchange all the five ball bearings, as they are not very expensive. The four "small" bearings of type 6304-C3 cost about 10...12 Euro each, the big bearing (6403-C3) roughly 25 Euro. Interestingly, in the more recent airhead gearboxes, two of the small bearings are open, one is closed on one side and the fourth one is completely closed. The technical reason is probably that the "closed" bearings were supposed to keep their oil over a longer time, however the old /7 gearboxes reportedly did not use this "mix" of bearings (thanks again to Daniel Dicke for this information).
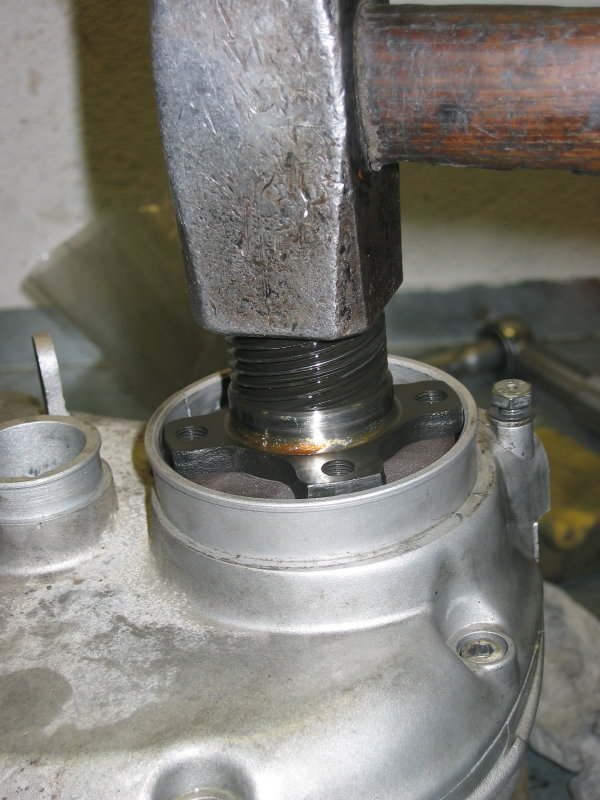
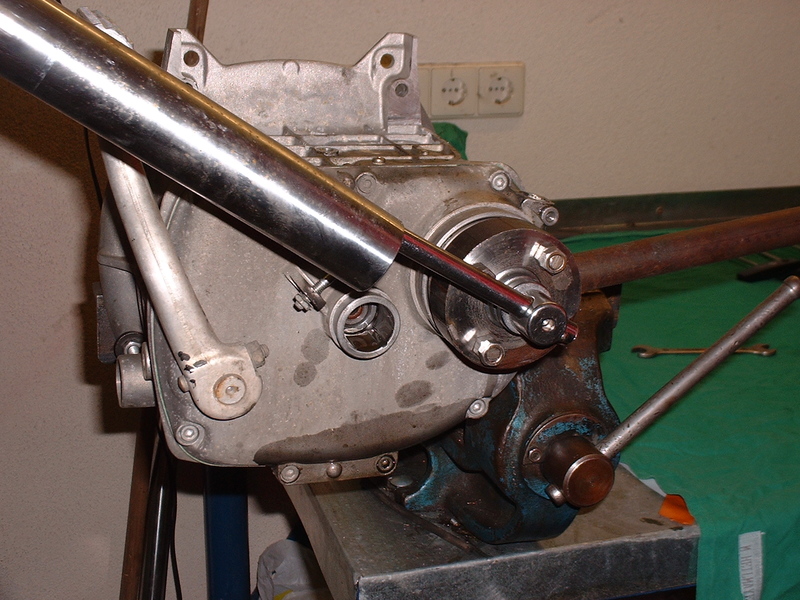
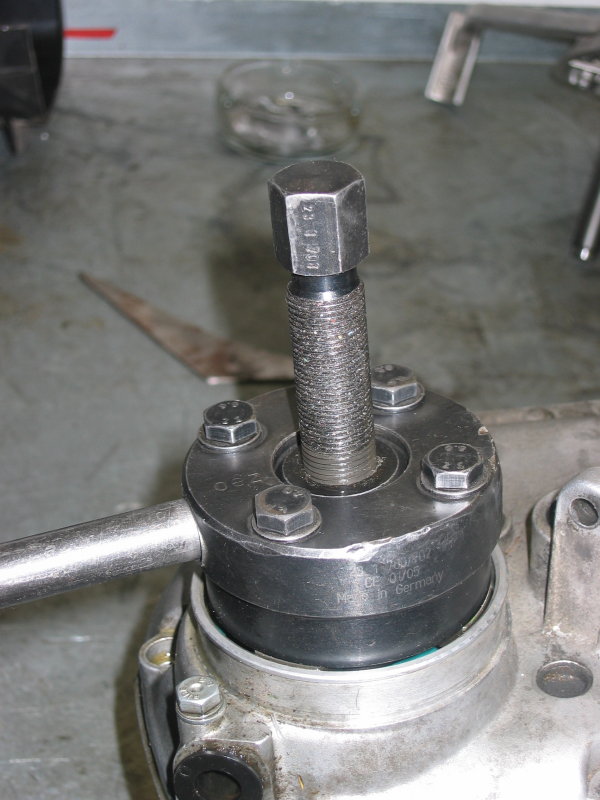
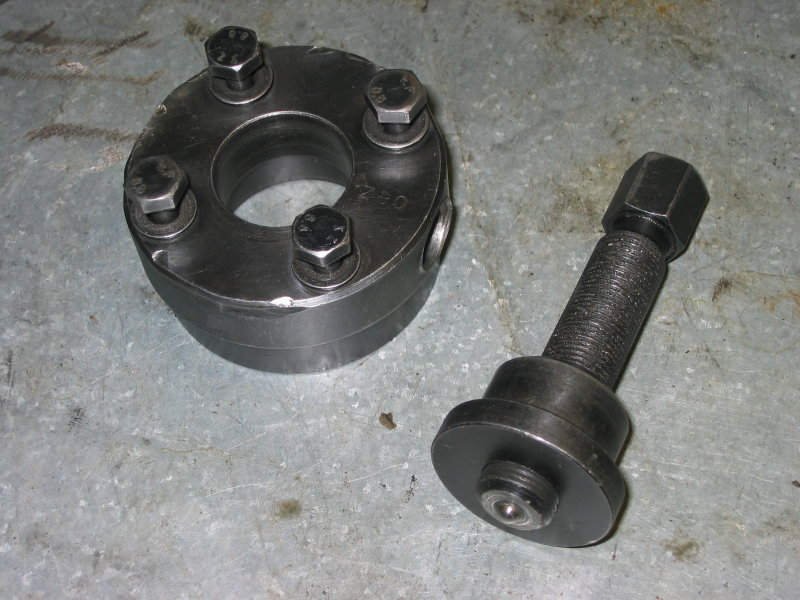
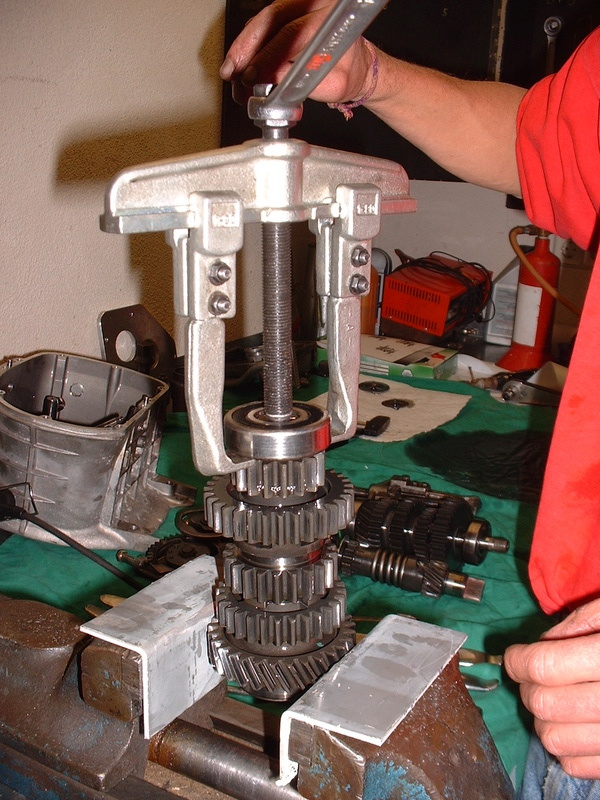
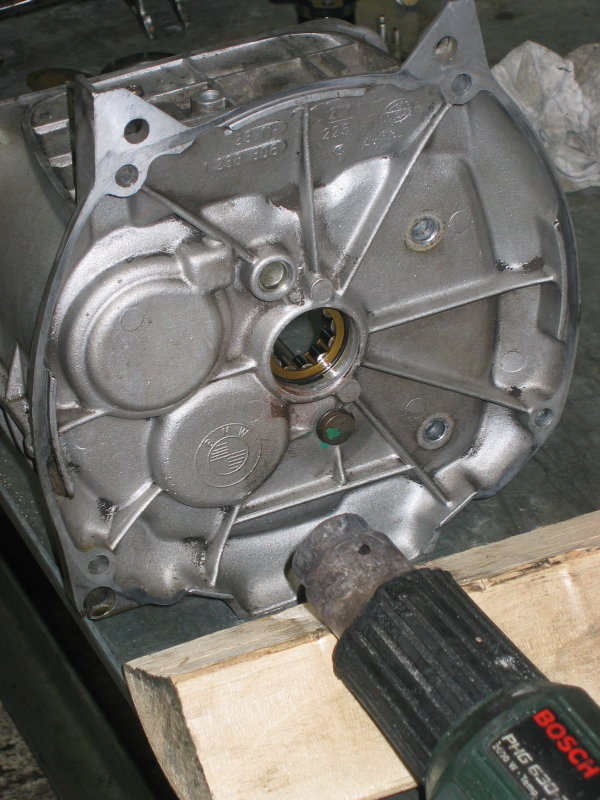
Changing the bearings is rather straightforward. Generally, use a two- or three-arm puller or a special bearing puller to extract the old bearing (if necessary, heat with a hot air gun to about 80° C). Then, fit the new bearing with a suitable tool, e.g. a large nut from a ratchet set plus a suitable press (you may use a hammer - as we did in the workshop -, although this is not a recommended way to deal with bearings).
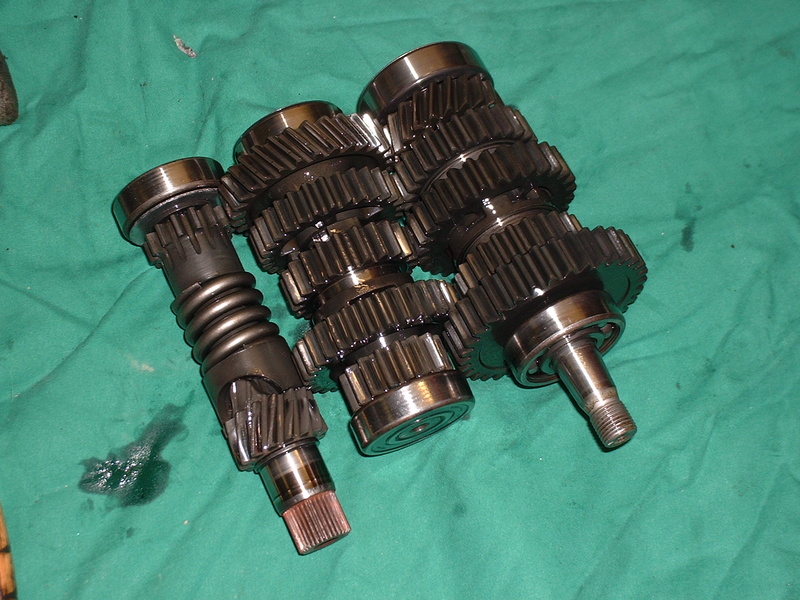
It may be worthwhile inspecting the individual gears for signs of wear ... and for correct installation: on my R100TIC we found that one of the spacers on the output shaft was installed "the wrong way round", which lead to increasing wear on this ring and increasing axial play during use. As mentioned above, this was meant to be a factory-new gearbox!
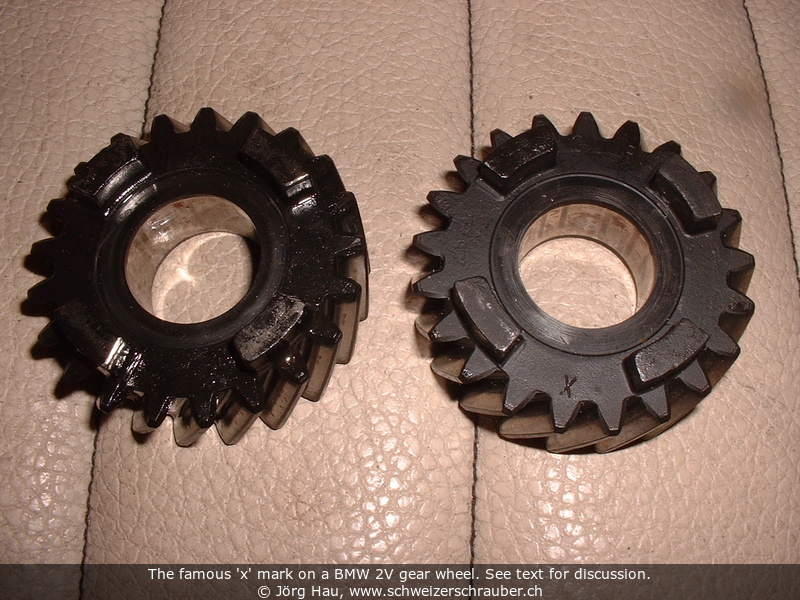
Just for the record, this picture shows the famous "X" mark of a gear wheel. In April 1982, BMW changed the pressure face angle of the teeth on the input shaft helical gear, the cluster helical gear and the output shaft 5th gear and it changed from 15 degrees to 17.5 degrees. The little "X" stamping denotes that those revised helical gears can't be retrofitted to an earlier gear set (= prior to April 1982) because they won't mesh correctly and will self destruct.
At this point, make sure you can shift through all the gears and back: It seems that it is possible to assemble the gearbox "wrongly", so that you can shift gears up - but then you are stuck .. :-(
Time to adjust shaft play.
Adjusting shaft play is a crucial step to ensure that your gearbox "behaves as designed". If the axial play of one or more of the three shafts is too high, they may move during use, which leads to "hanging" gears or other problems during shifting, in particular under high load. If the axial play is too low, the friction in the bearings is too high and you will experience loss of performance and rapid wear.
In theory, once your gearbox is well-adjusted, you do not need to re-adjust shaft play when you change the bearings. Yet ... how do you know your gearbox is well-adjusted? In the case of my R100TIC, I was told that the original gearbox had been replaced against a new one at about 50 Mm. When we opened this gearbox during the workshop it had run for about 35 Mm ... and we found not only that it was a refurbished one (clearly identified by traces/scratches on some parts) but that it had not at all been installed with the tolerances specified by BMW. The "allowed" axial shaft play is 0.05 mm, but we found the following axial shaft tolerances in this "original BMW" gearbox:
A little more play than 0.05 mm would be normal (think wear and tear), but 0.30 and 0.45 mm are really a lot. The large play explains the problems that I observed during gear shifts: the shafts move along their axes. Indeed, the troubleshooting list of the BMW workshop manual lists incorrect axial play as diagnosis for trouble during gear shifts ;-)
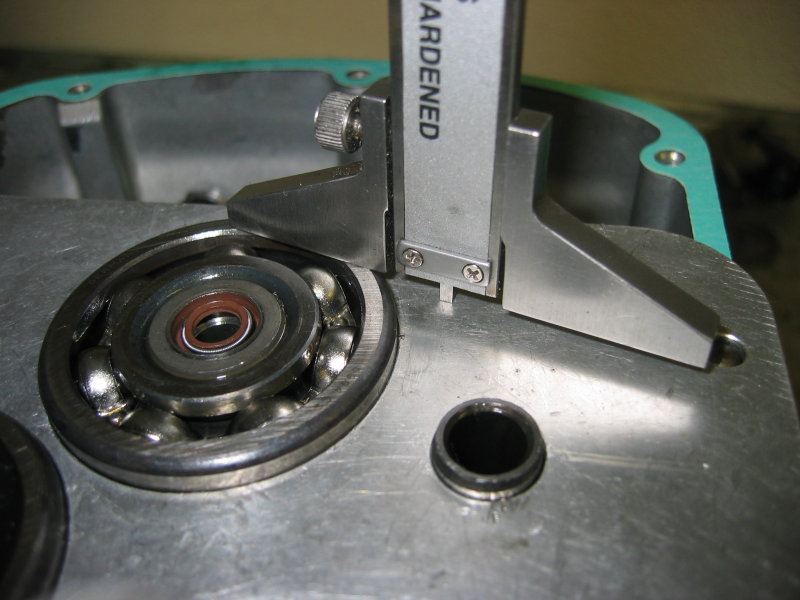
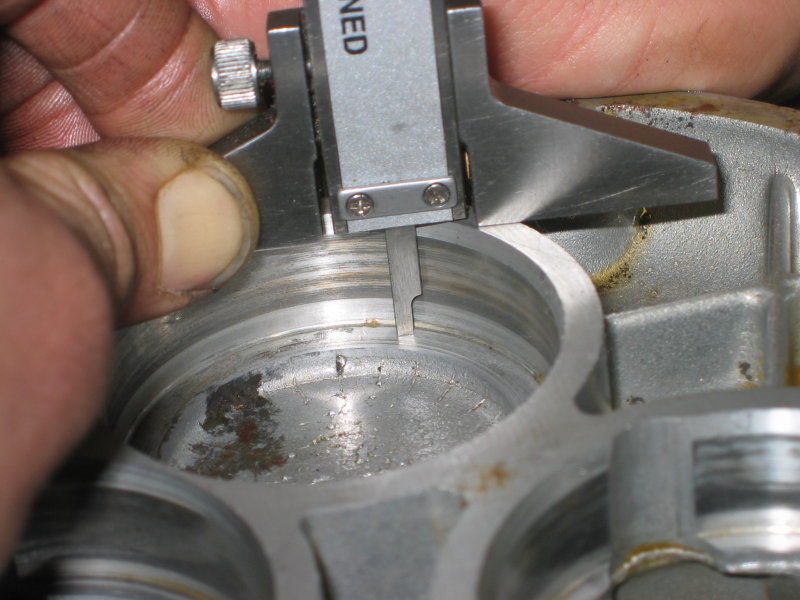
Adjusting the shaft play is not very difficult. Essentially, you determine the depth of the recesses in the gearbox cover and the thickness of the ball bearings "above" the gearbox housing, then you add shims (German: "Distanzscheiben") until the difference between those two is 0.05 mm or a bit less, but not zero.
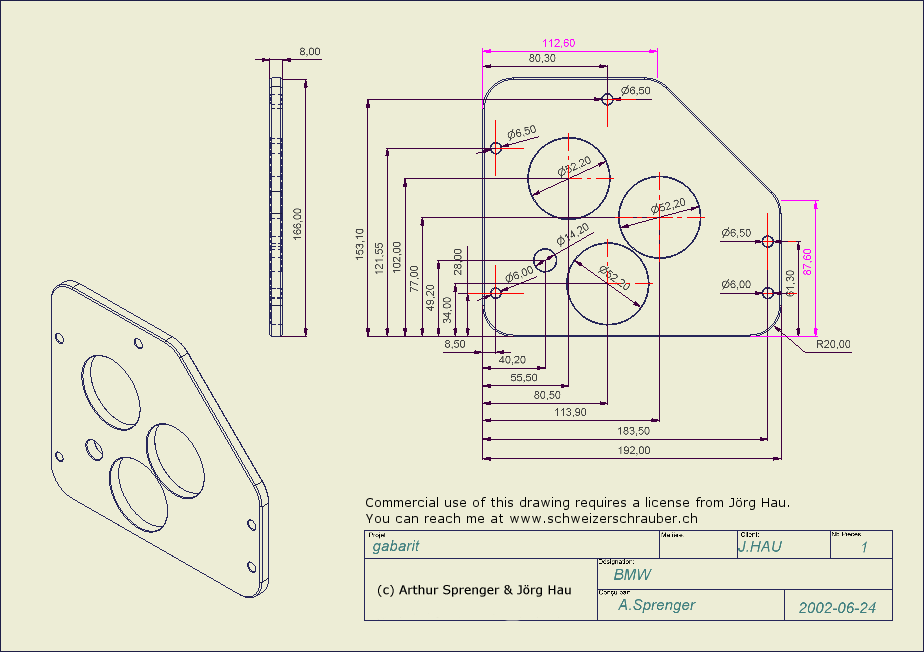
This requires, however, some precision instruments. You need a depth gauge with an accuracy of 0.05 mm ("Tiefenlehre"). The second part needed is the measuring plate ("Distanzierplatte"), which you may want to borrow from your friendly BMW dealer ... or, if you have access to a CNC-equipped workshop, you may build it according to the sketch shown here (also available in drawing exchange file format, .DXF). Note that the exact thickness of this plate is not of much importance (the original has 7.50 mm), but the surfaces must be exactly parallel.
If you think of commercial or "mass" production, make sure you have read and understood the legal stuff, copyright and usage notice!
To adjust shaft play, insert the three shafts into the housing as described above. Use a new gasket and attach the measuring plate with three bolts and the prescribed torque (10 Nm).
![]() A simple spreadsheet
for these calculations can be downloaded here in
Open Document spreadsheet format (this is the same file as mentioned above).
A simple spreadsheet
for these calculations can be downloaded here in
Open Document spreadsheet format (this is the same file as mentioned above).
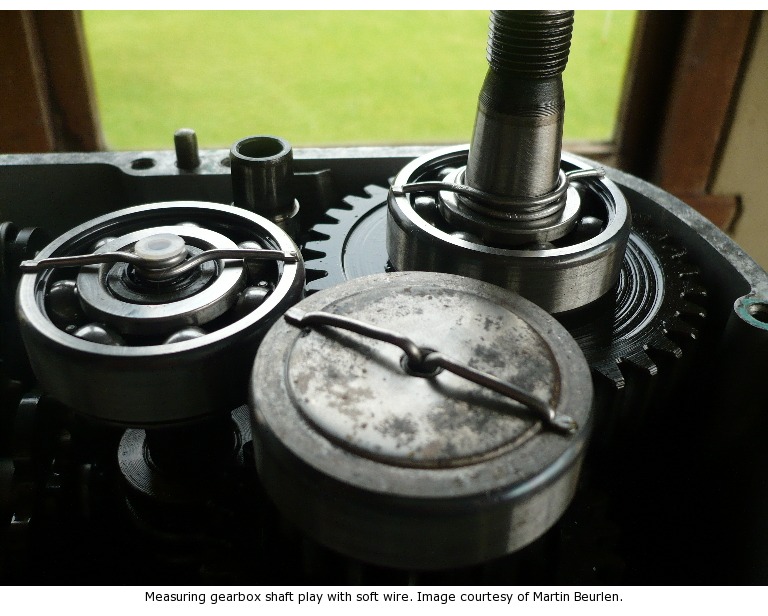
What can you do if you do not have the plate? Martin Beurlen from South Africa reported that the following procedure "sounds complicated but it actually works well" ;-)
The only downside that I can see is that you have to close and then remove the gearbox cover once more.
That's it. The gearbox is ready for use!